[dropcap_1]I[/dropcap_1] think I’m in juuuuuust enough of a feisty mood to write this necessary doctrine on The Chop. It’s raining. It’s muddy. The pigs have learned they can nose enough mud on the netting to ground it out.
Please don’t add to the list by BUSTING MY CHOPS.
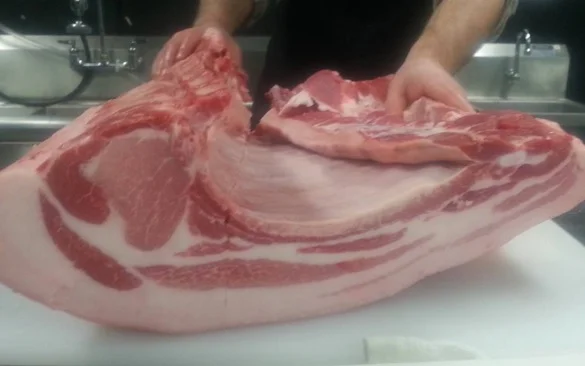
I’ll give everyone credit, it’s pretty easy to ruin a chop. The chop comes from the loin, which runs high along the back of the hog. It is one of the least-used muscles on the whole dern piggy. That makes it boring and overratedtender. And thus, a good candidate for the fast, quick cook.
If you’re not properly coached, however, “cook” can turn your innocent chop into a disk of leather before you can say, “How long does it say to fry this again?” Luckily, heritage pork like ours has a bit of extra fat built into the muscles, so there is a buffer for error. I’m working very hard every day to get more fat inside your pork chop.
But if you follow these steps, you will have a perfect chop every time. Trust me. Do you trust me?
[h2]Step One: Plan ahead[/h2]
I know. It’s as hard for you as it is for me. Pork chops are supposed to serve as the solution to, “Oh, crap, I haven’t thought about dinner.” I'm supposed to be able to thaw and fry them up in the time it takes the children to form a hangry swarm around the kitchen table. I mean, you CAN do this, but feel ashamed about it. There are better ways. For best results, brine your chops.
The brine provides another layer of protection against overcooking, in addition to flavoring the inside of your meat. Brining alters the protein structures, and, well, science. Don’t argue with science.
We use a simple brine solution of 1 q water, ¼ c salt and ¼ c brown sugar. This usually is enough to cover four chops in a small casserole dish. I refrigerate the chops in the brine for at least 4 hours, usually more if I can remember to get things going in the morning.
Let my boring brine be the base for something more exciting. You can really go nuts with the brine, adding herbs, spices, anything you like. Bay, juniper, peppercorns, citrus, garlic, onion. Rosemary, pink peppercorns, sage, fresh coriander. Experiment. Live life a little. Tell me what you like best.
[h2]Step Two: Beat the heat[/h2]
The USDA once recommended a cooking temp of 160 degrees for pork chops. Can you imagine?! This is why all the pork chops of my youth were ruined.
Well, that and the fact that the industry bred all the fat out of the pork sold at the grocery store. On purpose. I don’t understand it. Times were different, we’re all still paying the price.
The USDA revised the temp to 145, but around here, we've always taken our chops a little pink.
We live on the wild side.
[h2]Step Four: The cook[/h2]
This method assumes our standard ¾” chop from one of our shares. Adjust as necessary.
Remove from brine and rinse/dry. Let chops come to room temp, about 30 minutes.
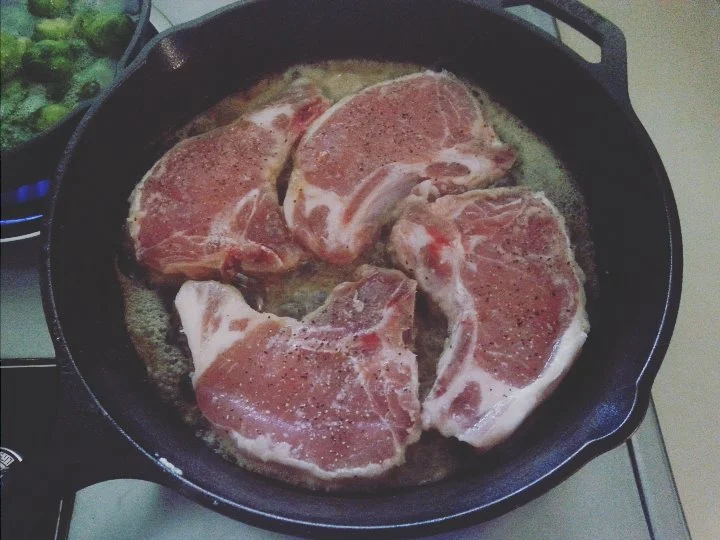
Melt a few tablespoons of butter in a cast iron pan. That’s really what these chops deserve. It’s what you deserve.
Heat the pan to medium high and slap those bad boys down. Turn the heat down to medium. Set the timer for 5 minutes.
Don’t fiddle with them.
At the beep, flip them and cook for 4 minutes more. That’s the maximum you are allowed to have them on the heat. Every second longer that you cook them, an angel sheds a tear for America. Angel dehydration due to overcooked pork chops is a serious thing. If you have a thicker chop, you have my permission to transfer the whole pan to a hot oven for a minute or 4, depending on the size of the chop. Translucent white or even a little pink in the center is OK. Adjust your times as necessary to achieve this. This is the way the pigs have requested it in their will.
When the appropriate time has passed, take the chops out of the pan and put them on a plate to rest. Don’t forget to deglaze the pan with your most delicious liquid, (beer, homemade stock, blackberry vinegar) and pour this goodness over the chops at serving time. As an alternate, you can cook some brussel sprouts or greens or fry up your vegetable of choice in this liquid.
[h2]Step Five: Eat the fat[/h2]
This is not your mother’s pork chop. (Sorry, mom! The deck was stacked against you!!) I can remember the grisly ring of hard fat wrapped around pork chops , pulling the whole thing up in the middle. It was gross. It was trimmed off. It was fed to the dog. But the fat from our chops is designed to be soft, delicious, caramelized from the sugars in the brines and perfect, like pork candy. You can eat this fat. You can even ask for seconds.
NEXT UP: WHAT THE HOCK?! Tips for preparing fresh hocks.


